S/MIME certificate request for email-only
1.Log in to HARICA CertManager
Visit HARICA’s CertManager and sign up to create your account.
Your personal information must be accurate and fully matched (letter-by-letter) with a government-issued identification document.
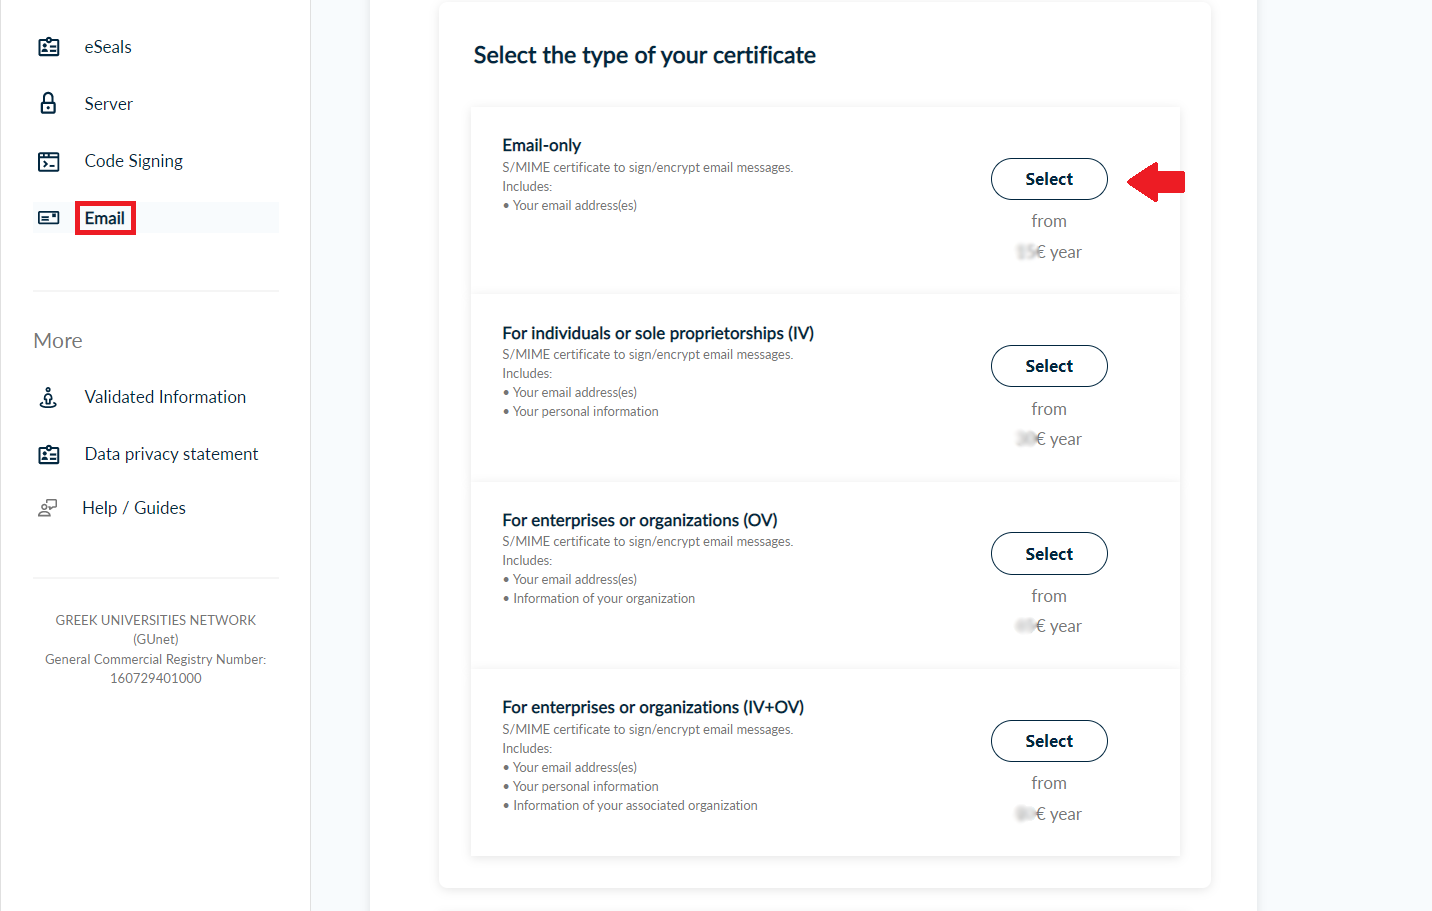
2.Request for Email Certificate
Once you log in, from the side bar, click Email and Select one of the following certificate types.
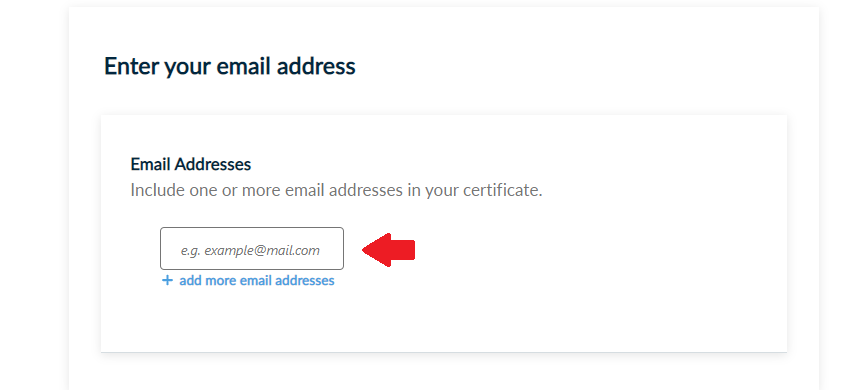
Next, enter your email address. You have the option to include one or more email addresses to your certificate. You can add up to three different email addresses with additional cost.
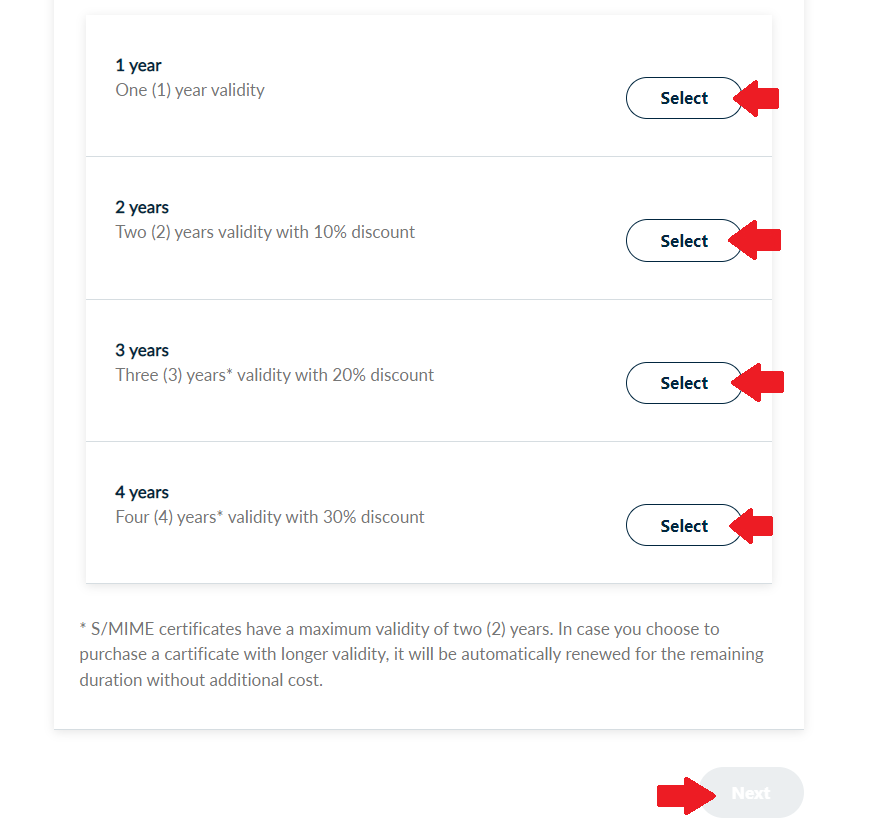
Choose the duration of your certificate and click Next.
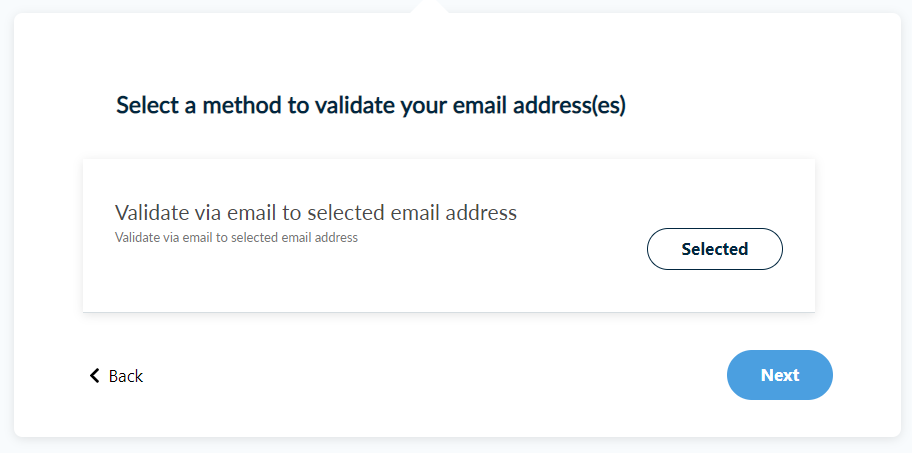
3.Select authorization method
You have to select the following email validation method to prove you control/own your email address(es). Then, click Next.
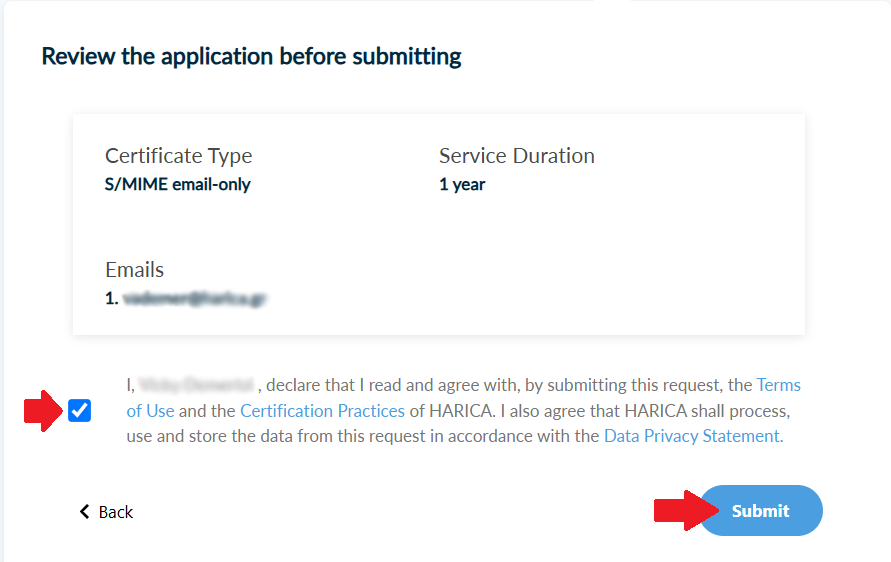
4.Review and submit request
Check to make sure that all of the information is correct, accept the Terms of Use, the Certification Practices of HARICA and the Data Privacy Statement. Then, click Submit.
5.Validate email address
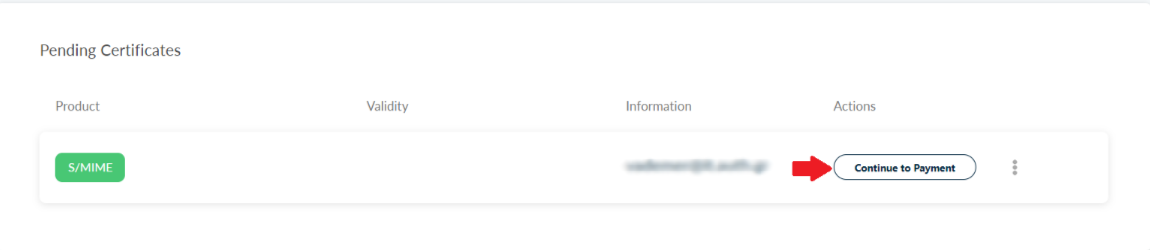
Once the request has been submitted, check the column Actions from My Dashboard. You may have to confirm you control/own your email address(es).

6.Complete transaction
Once all actions have been completed successfully, the next step is to proceed to the payment of your S/MIME certificate. To do that, click Continue to Payment.
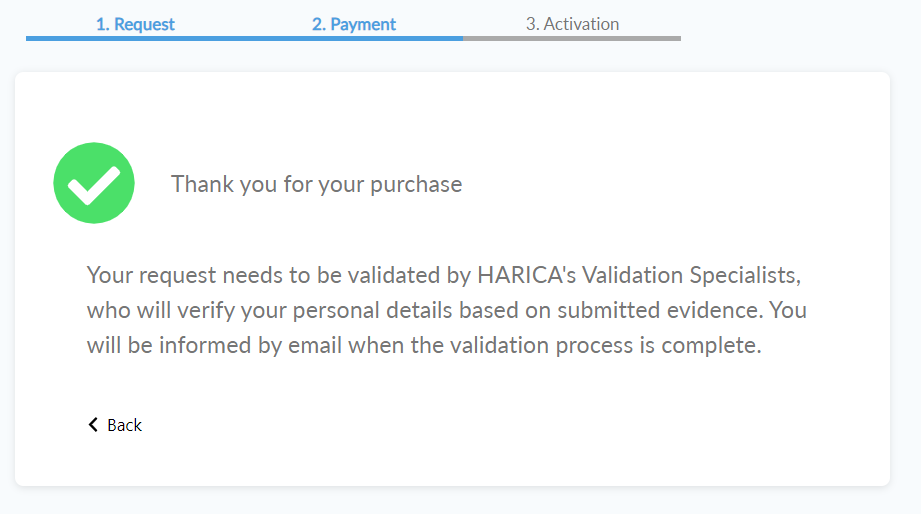
Fill in all the necessary information, click Continue to Payment and you will be redirected to our partner bank’s e-Commerce environment to complete the payment.

Once the payment is complete, you will be redirected back to HARICA’s CertManager confirming the purchase of your Certificate.
7.Enroll Certificate
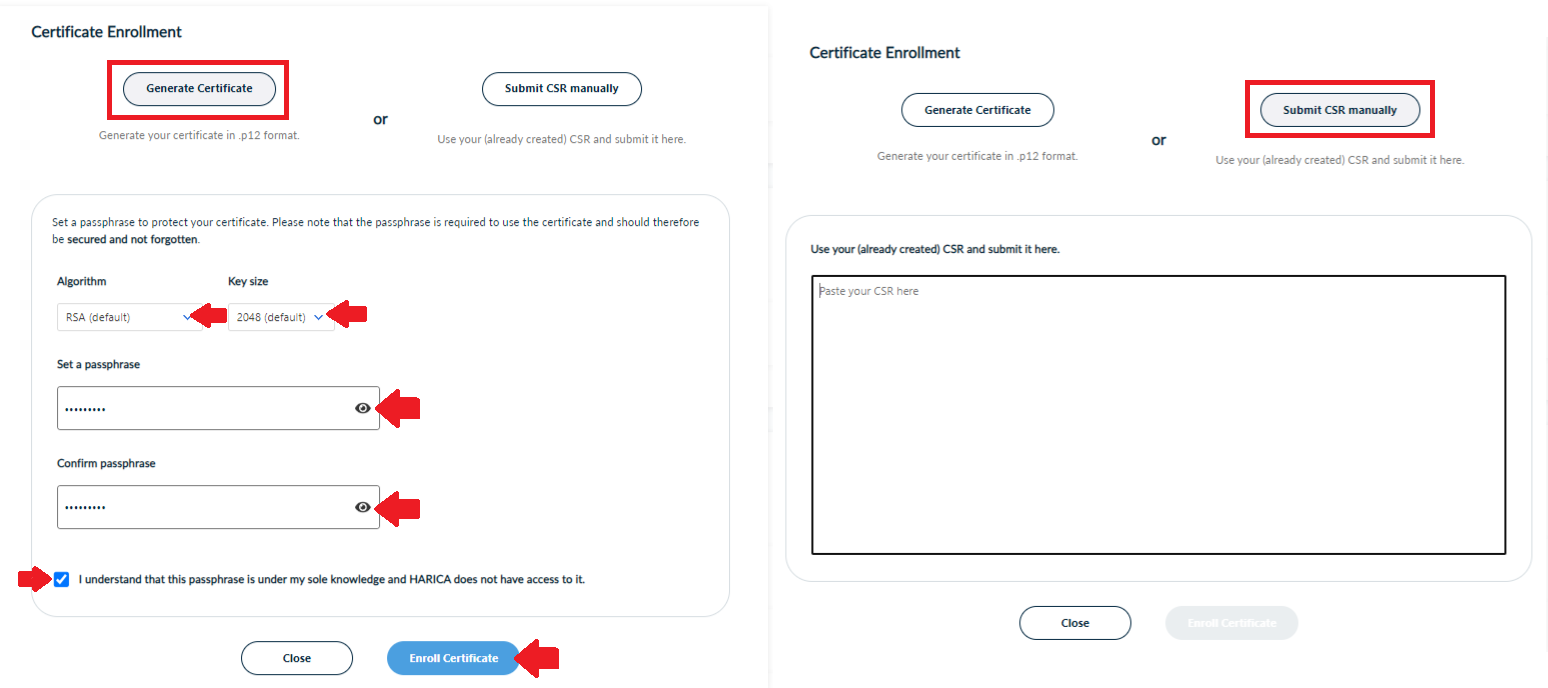
Now, you can proceed with the certificate enrollment. Click Enroll your certificate.

You have the option to generate your certificate in .p12 format or submit a CSR file you have already prepared (e.g. using openssl).
The Generate Certificate option requires you to select the key type/size and set a passphrase that you must remember since it will protect the private key of your certificate. Click Enroll Certificate.
When the enrollment process is completed, you can download your certificate. Click Download.
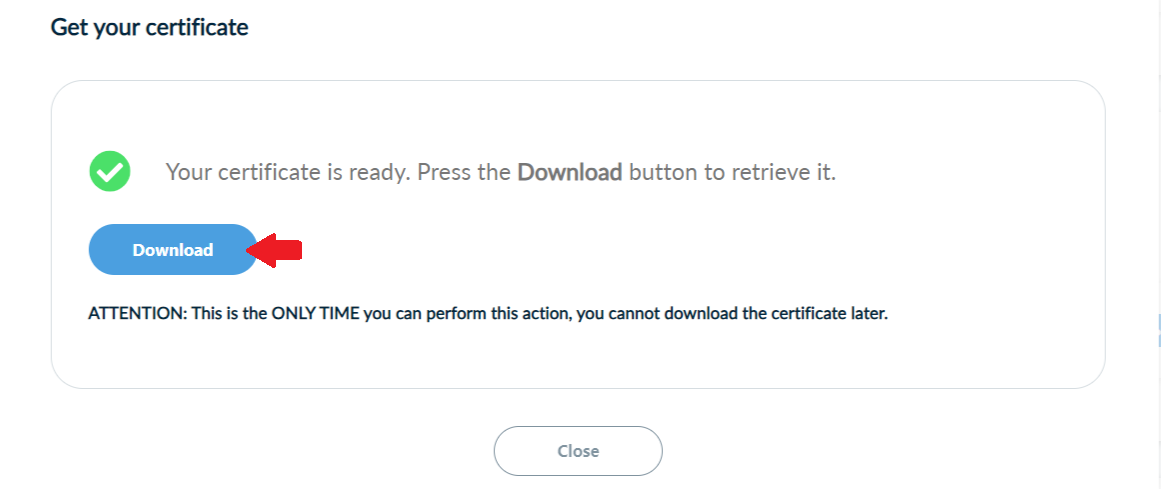
If the process has been completed successfully, a file named Certificate.p12 will be downloaded to the Downloads folder (by default) of your computer.
Run this file to install the certificate on your computer.
