Instructions for signing PDF documents using Adobe Reader DC
A) Install SafeNet Authentication Client on your computer
The following instructions describe the installation of Windows drivers for the usb token which is shipped to you with the purchase of your certificate.
1.
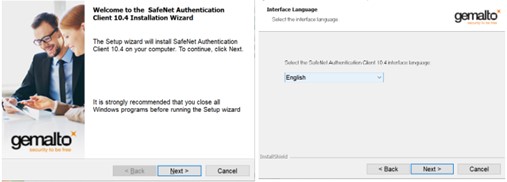
Download and install SafeNet Authentication Client software depending on your computer’s operating system.
For Windows
SafeNetAuthenticationClient-x32-10.8.msi
SafeNetAuthenticationClient-x64-10.8.msi
For MAC
SafeNet Authentication Client 10.8 for Mac.dmg
2.
Click Next and choose your language.
3.
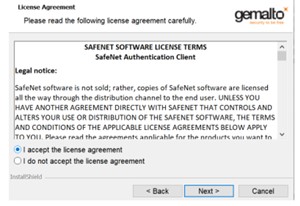
Accept the license agreement and click Next.
4.
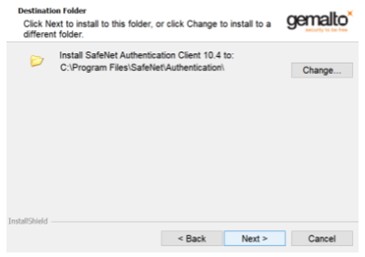
Choose the folder in which the software will be installed and click Next.
5.
Then, click Install.
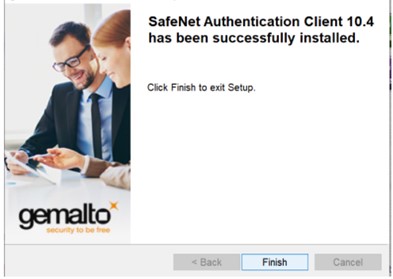
6.
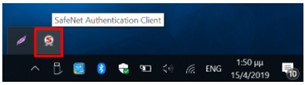
Once the installation is complete, software’s tray icon is displayed on your taskbar.
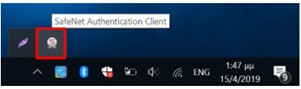
7.
Connect your usb token on your computer and the tray icon will be highlighted. This means that the token is ready for use.
B) Install Adobe Reader DC and configure timestamp server on your computer
1.
Download and install Adobe Reader DC for Windows from here.
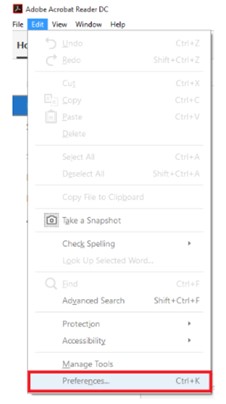
2.
Once the software is installed, open it and choose Edit -> Preferences.
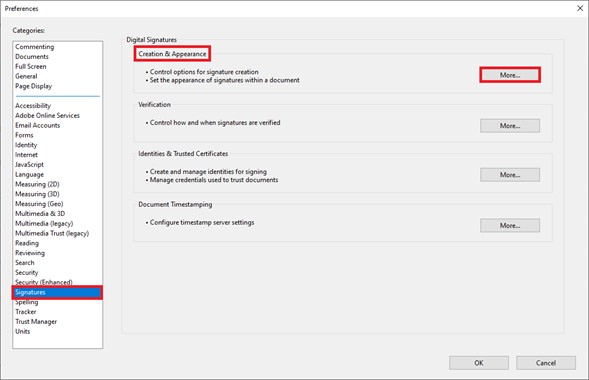
3.
Choose Signatures -> Creation & Appearance -> More.
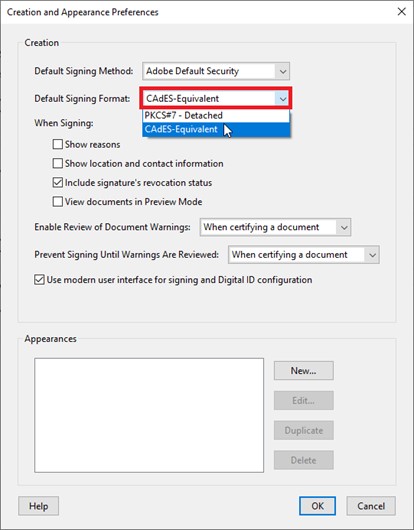
4.
For increased compatibility with other signature control systems and the International Standards ISO 32000-2 and ETSI 319 142, choose CAdES-Equivalent as Default Signing Format.
Then, click OK.
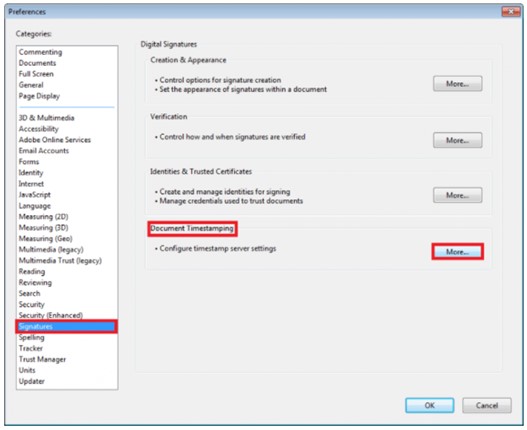
5.
Choose Signatures -> Document Timestamping -> More.
6.
In the next window, choose New.
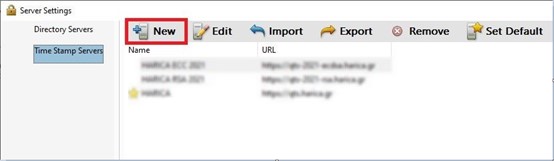
7.
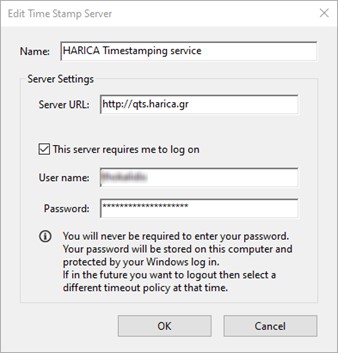
Use HARICA’s timestamp server and provide timestamp username/password that you received by SMS on your mobile number. Then, click OK.
| Name | HARICA Timestamping service |
| Server URL | http://qts.harica.gr |
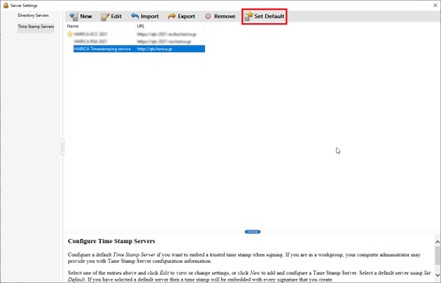
8.
Click on HARICA Timestamping service and choose Set Default. Then, close the window.
9.
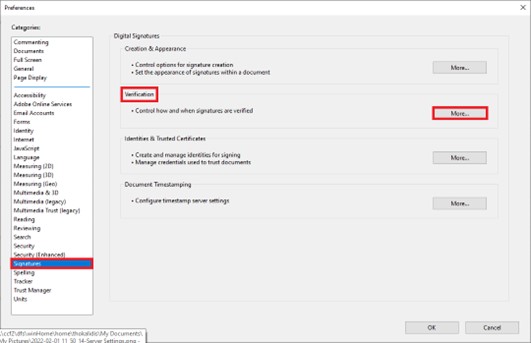
Now from Preferences choose Signatures -> Verification -> More.
10.
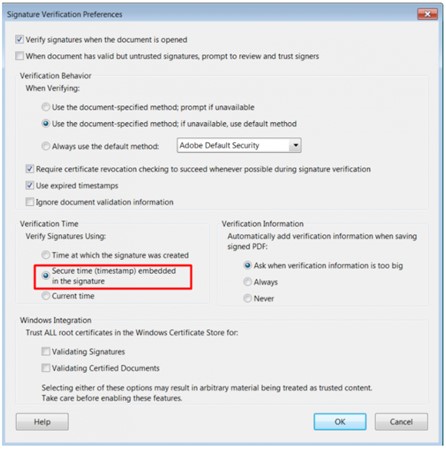
In Verification Time field, click on Secure time (timestamp) embedded in the signature. Then, click OK.
Choosing this option, your eSignature will be validated as of the secure time from HARICA’s timestamp server that you set earlier.
C) Sign PDF documents using Adobe Reader DC
1.
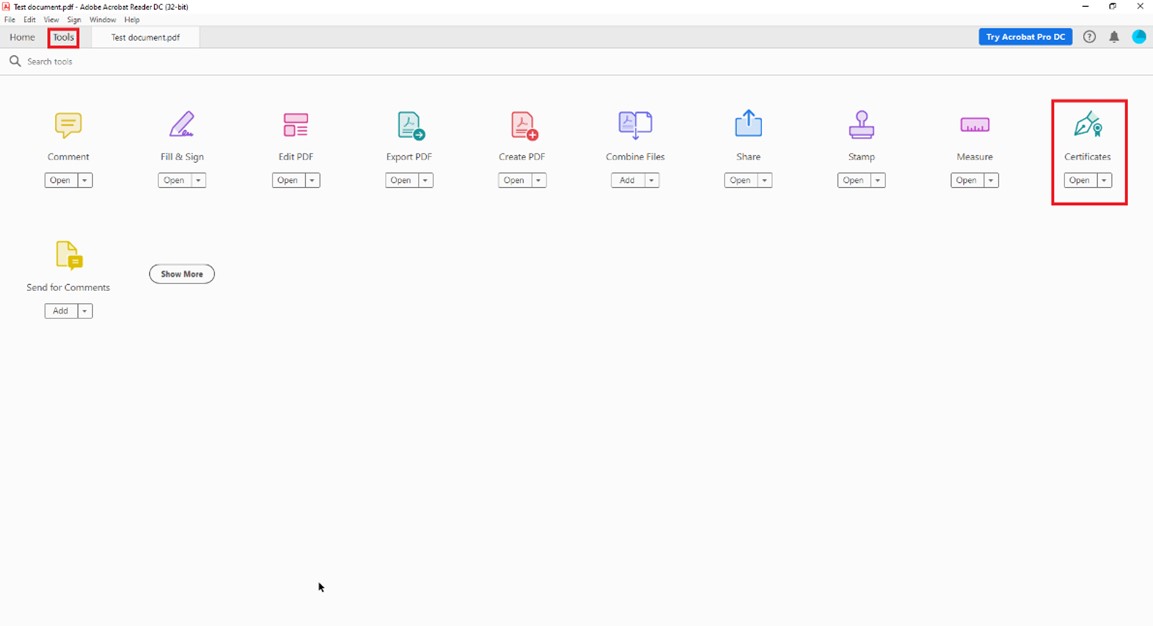
Open the PDF file you wish to sign and choose Tools -> Certificates.
2.
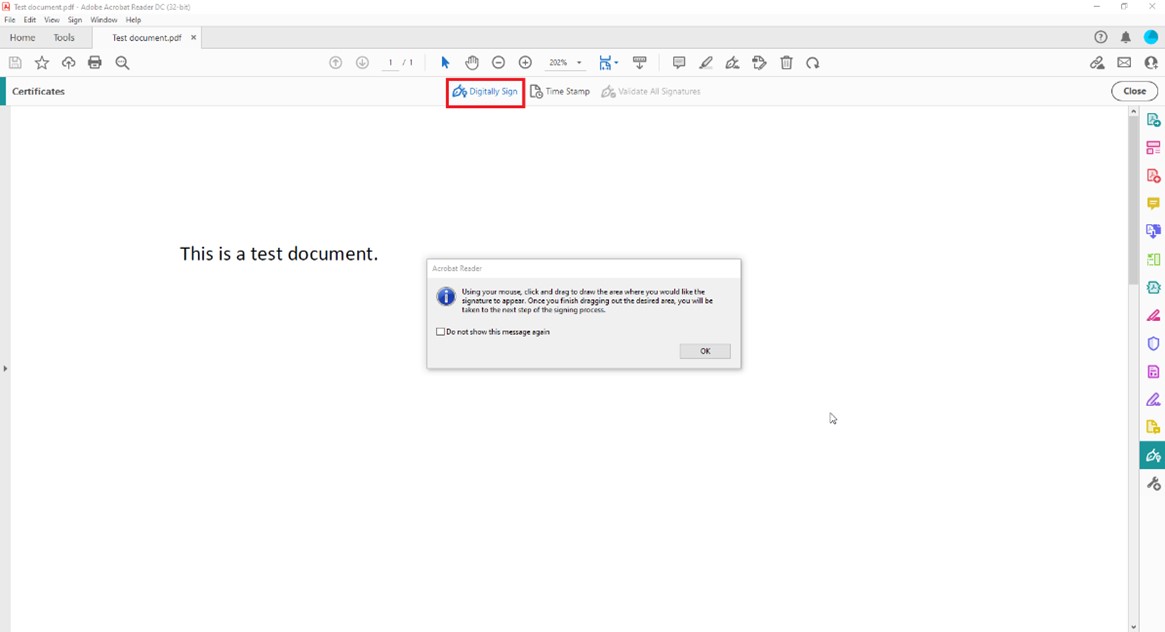
Choose Digitally Sign and press OK, if needed.
3.
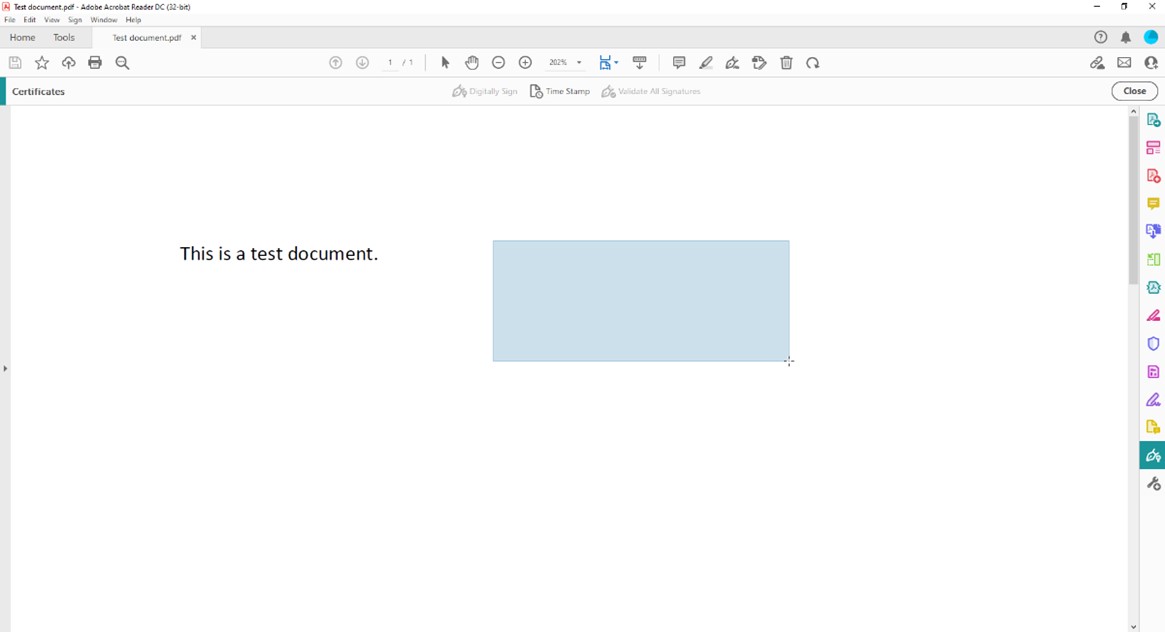
Click and drag to draw the area where you would like your signature to appear.
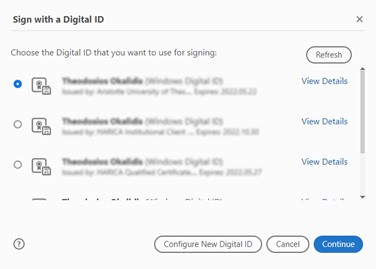
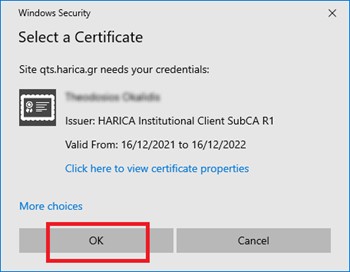
4.
A pop-up windows will appear. Choose your certificate from the list and click Continue.
CAUTION! If this windows doesn’t appear in this step and the software asks you to configure a new digital ID, this means that your computer can’t find your certificate. In this case, confirm that your certificate is properly installed on your computer or contact support@harica.gr.
5.
Confirm that the certificate you selected in the previous step is correct and click Sign.
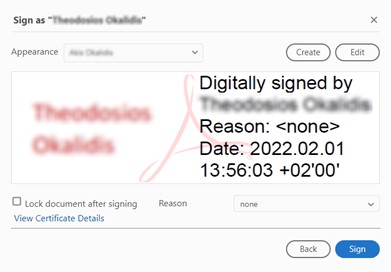
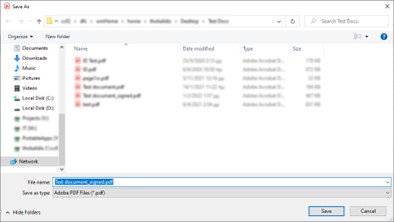
6.
Save your file on your computer.
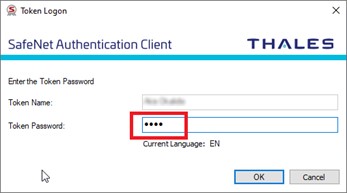
7.
You maybe asked to enter your PIN (token password).
8.
If you configured to use HARICA’s timestamping service, a pop-up window may appear to allow the server to connect and add its secure time in the signature. In this case, click OK.
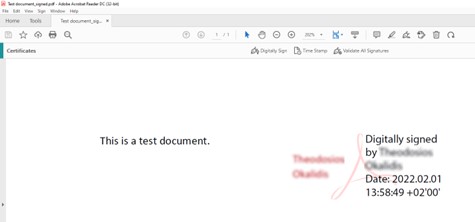
9.
Finally, your file is signed.