Instructions for signing documents through HARICA’s CertManager
1.
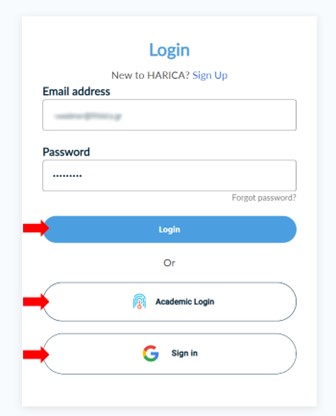
Visit HARICA’s CertManager and log in to your account.
2.
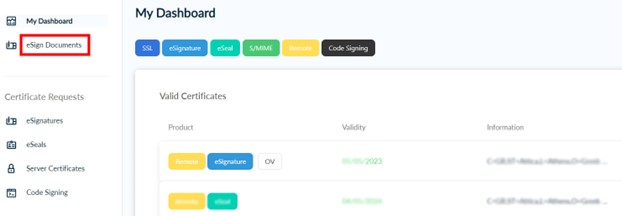
At the left side of the screen, click eSign Documents.
3.
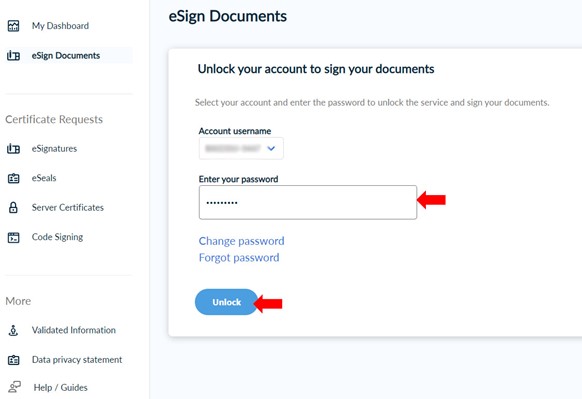
Unlock the service using the password you set during the activation process of your account.
CAUTION! In case you don’t remember your password, you have to revoke your certificate from My Dashboard and apply for a new one.
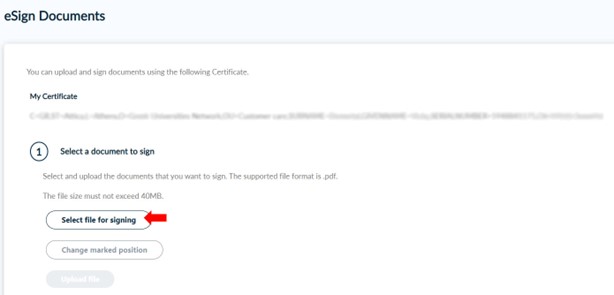
4.
Click Select file for signing and choose the document you wish to digitally sign.
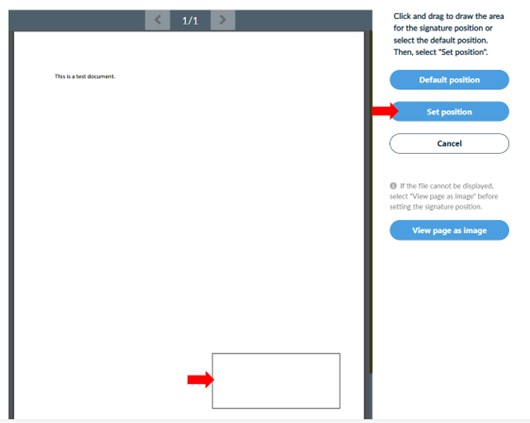
5.
Mark an area inside the document to set the position of your signature or choose the default position. Then, press Set position.
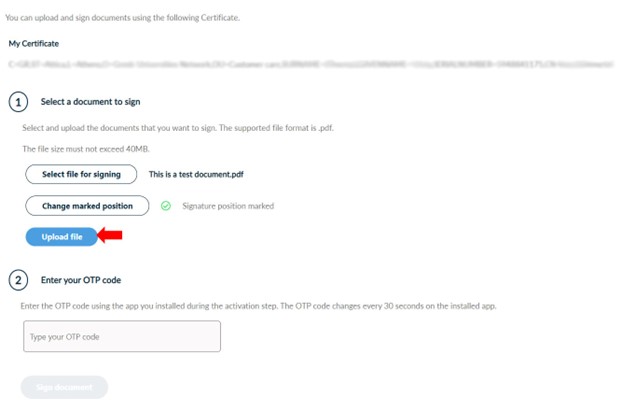
6.
Click Upload file.
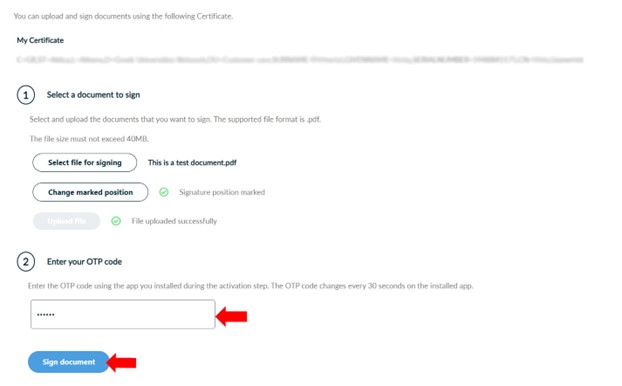
7.
Once the document is uploaded, open the authentication application that you have installed on your mobile device (e.g. smartphone, tablet) during the activation step, find the account “HARICA RemoteSign -username-” and enter the current 6-digit One-Time Password (OTP). Then, click Sign document.
CAUTION! The OTP is changing every 30 seconds.
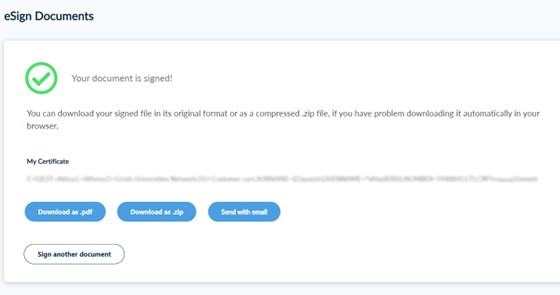
8.
Download your signed document as .pdf, .zip or send it as attachment to your email address.